Category Archives: Methodology

Ghost Signs on Model Railroad Buildings

Now for something completely different.

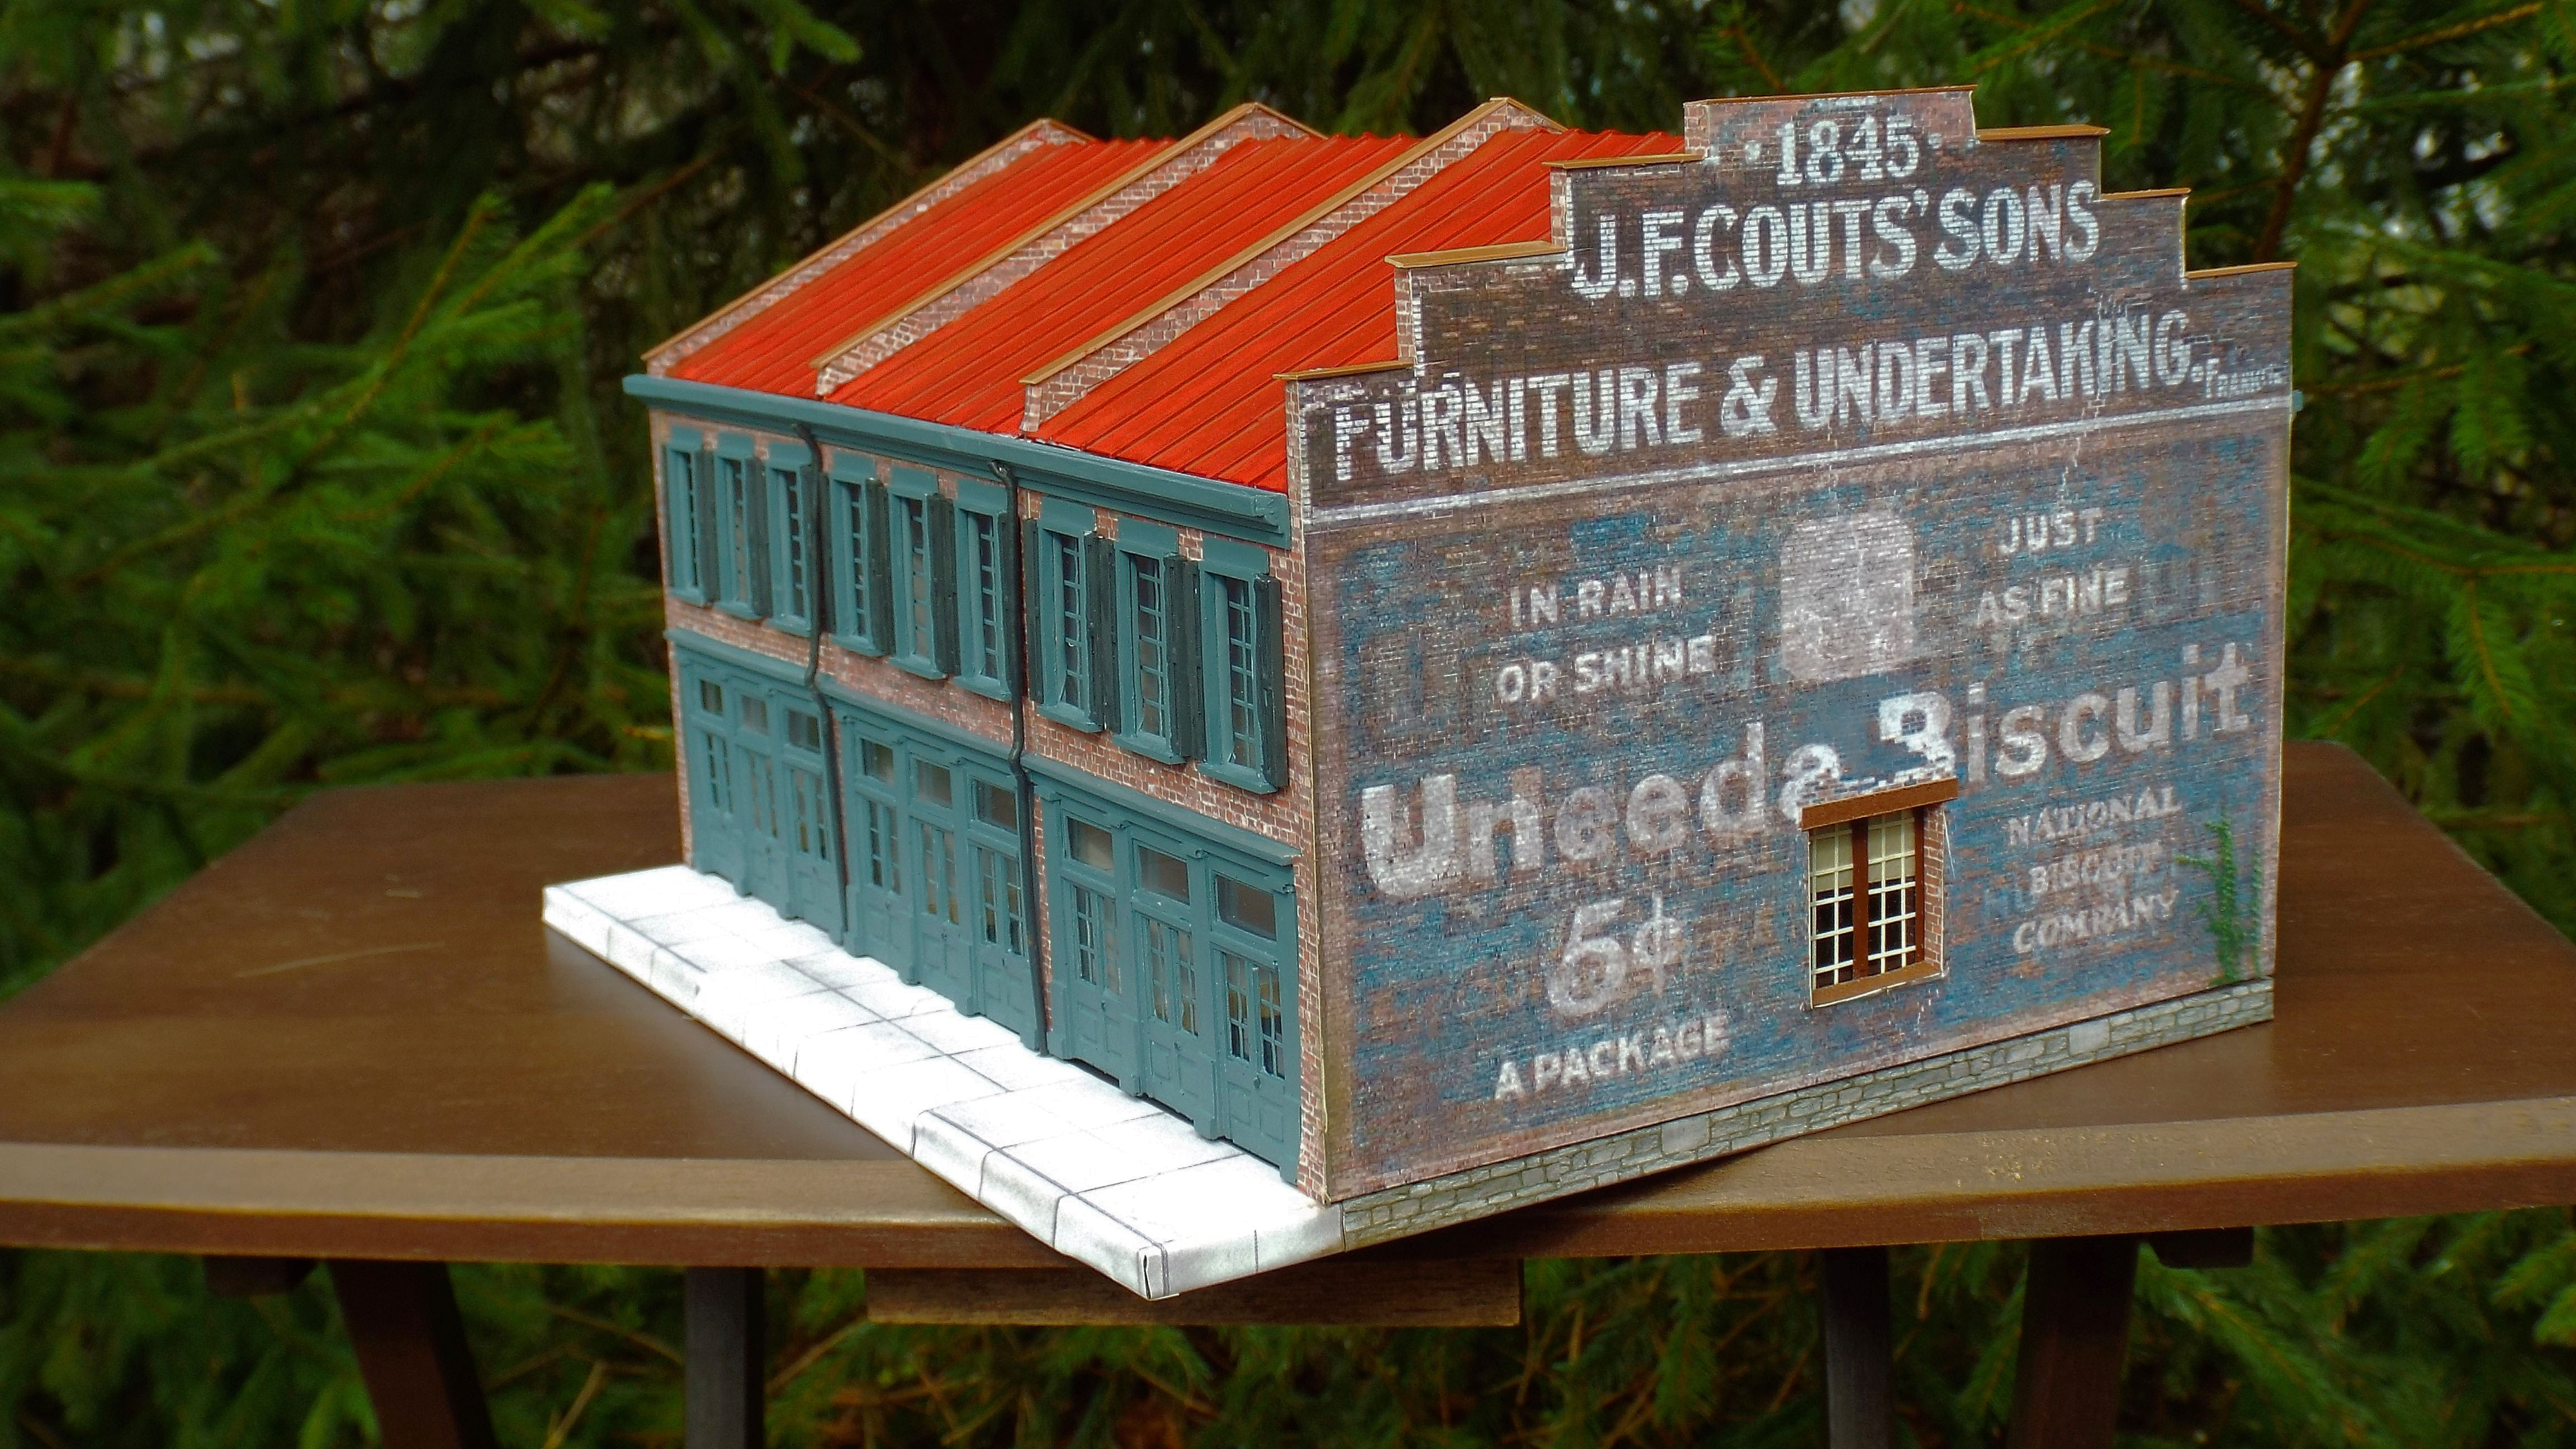
I was contacted by a member of a large group of model railroaders about using one of my photographs as a graphic to be added to a model railroad building.   Although I have never built a train layout, I have enjoyed them since I was a kid, so of course I agreed.

Here is my original photograph, from Clarksville, TN.

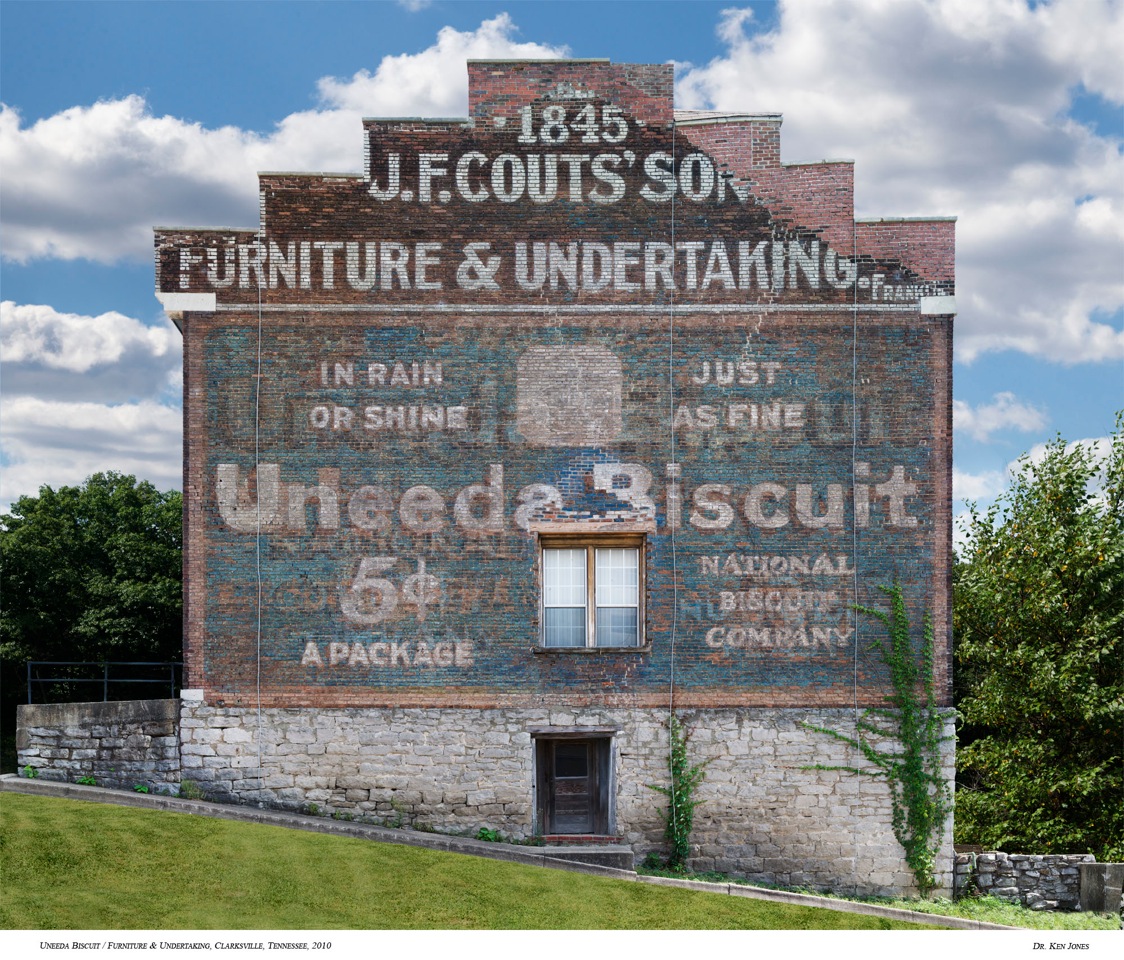
Nice patch job (digital, of course) on the upper right section by Bill Gill. 
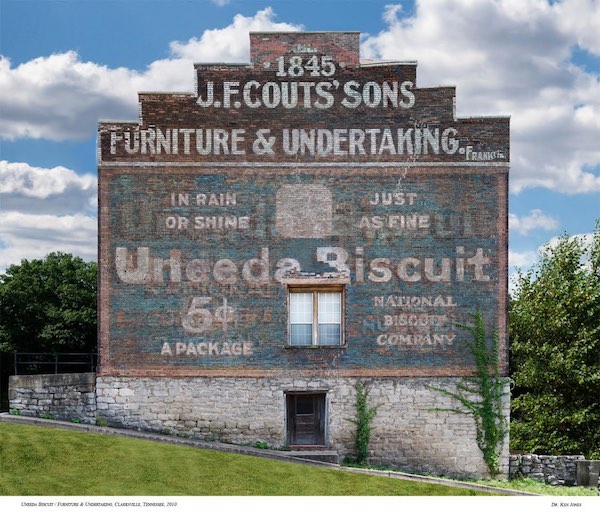
Here is the building mostly completed, by Bob Santos.  Here is a link to their site and forum : http://www.railroad-line.com

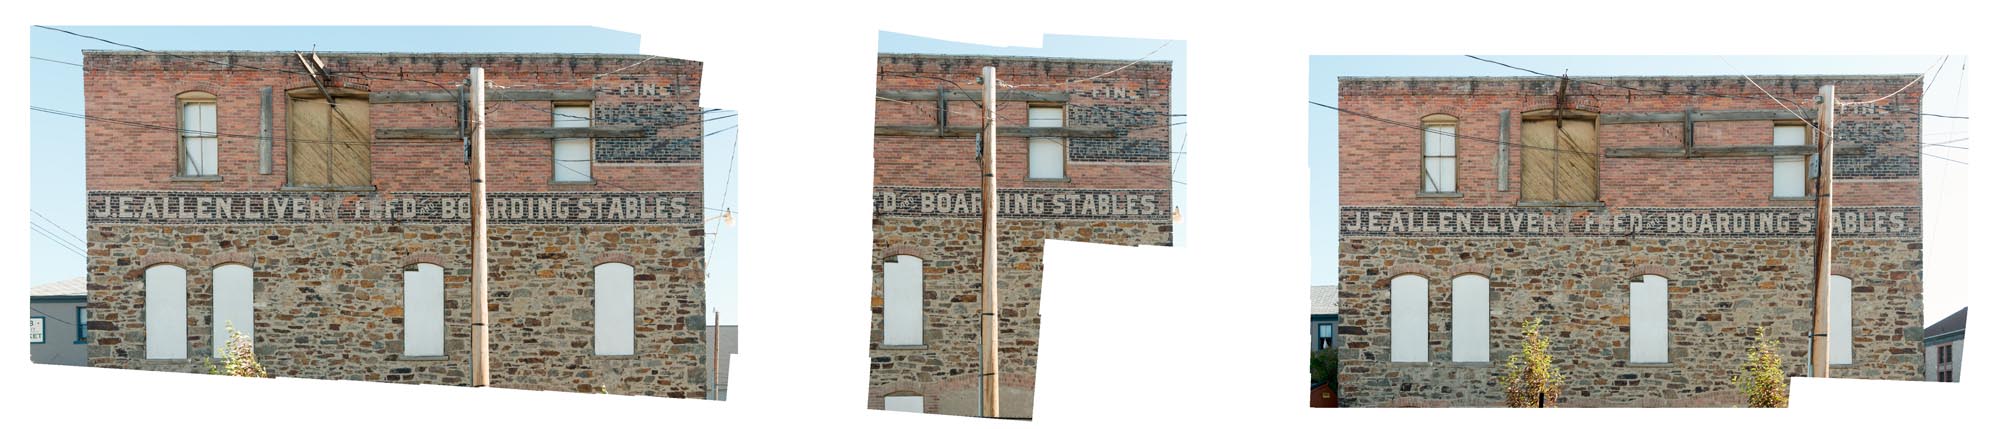
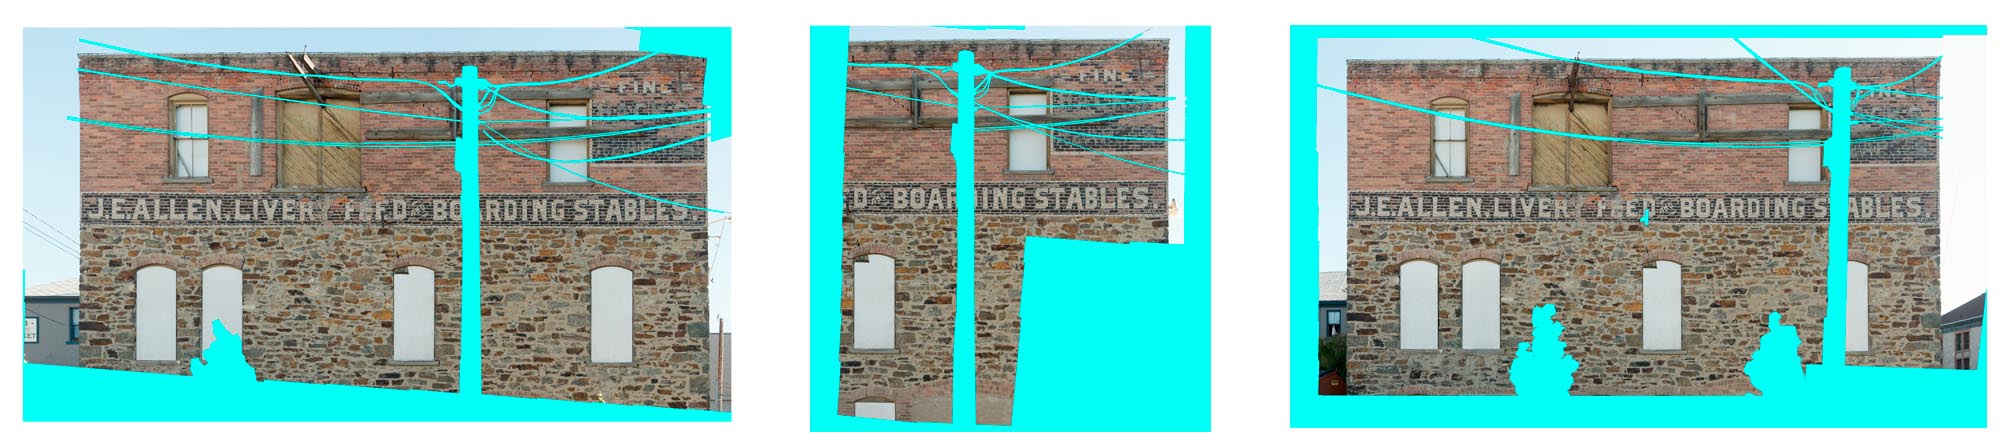
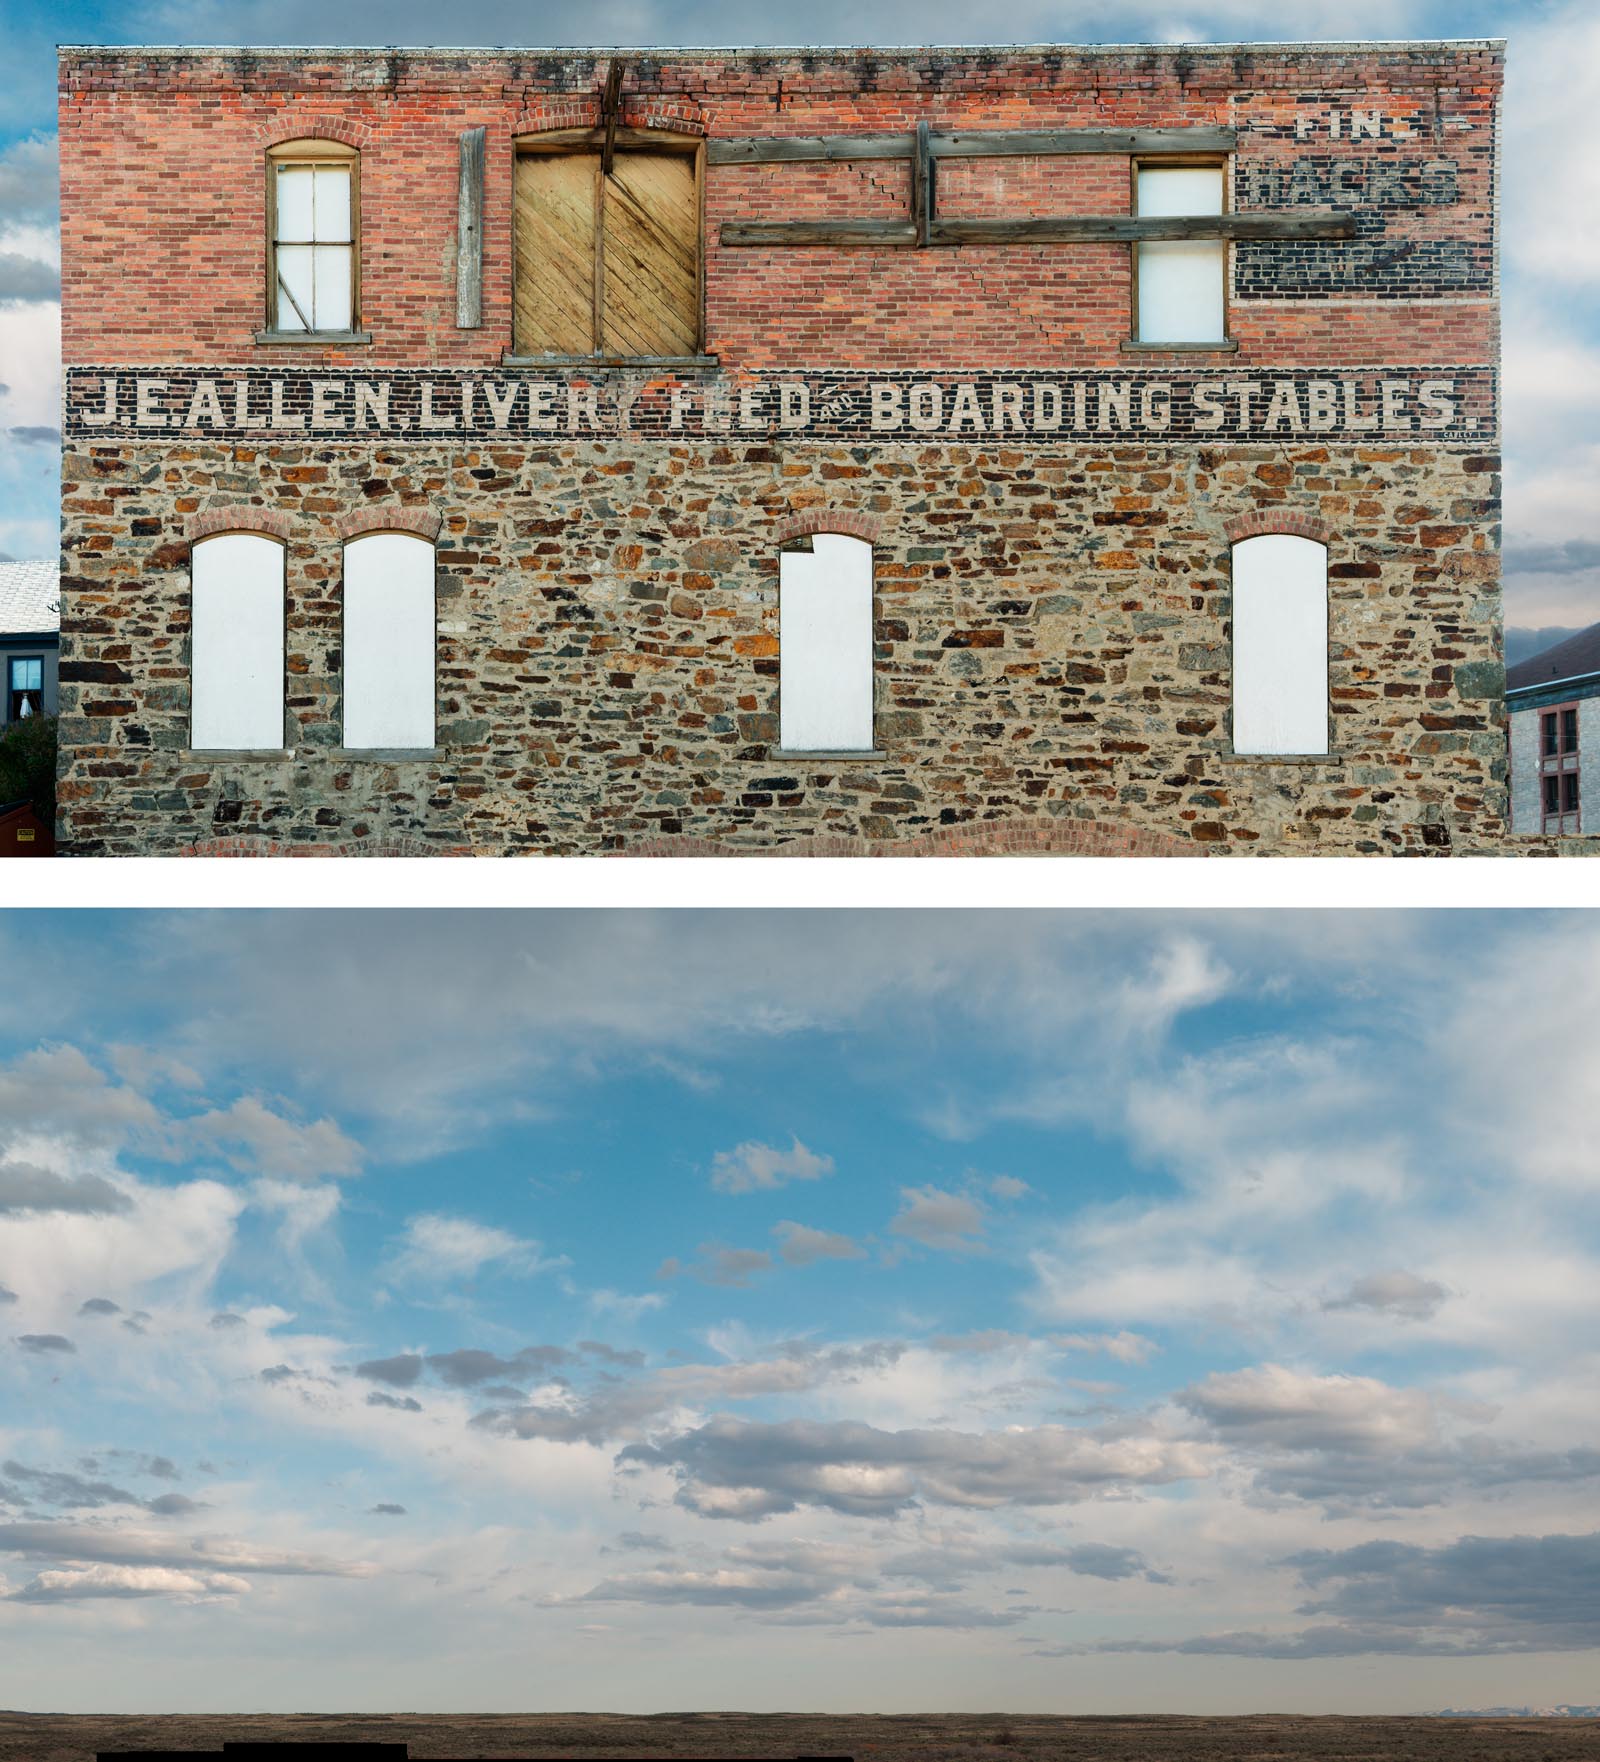
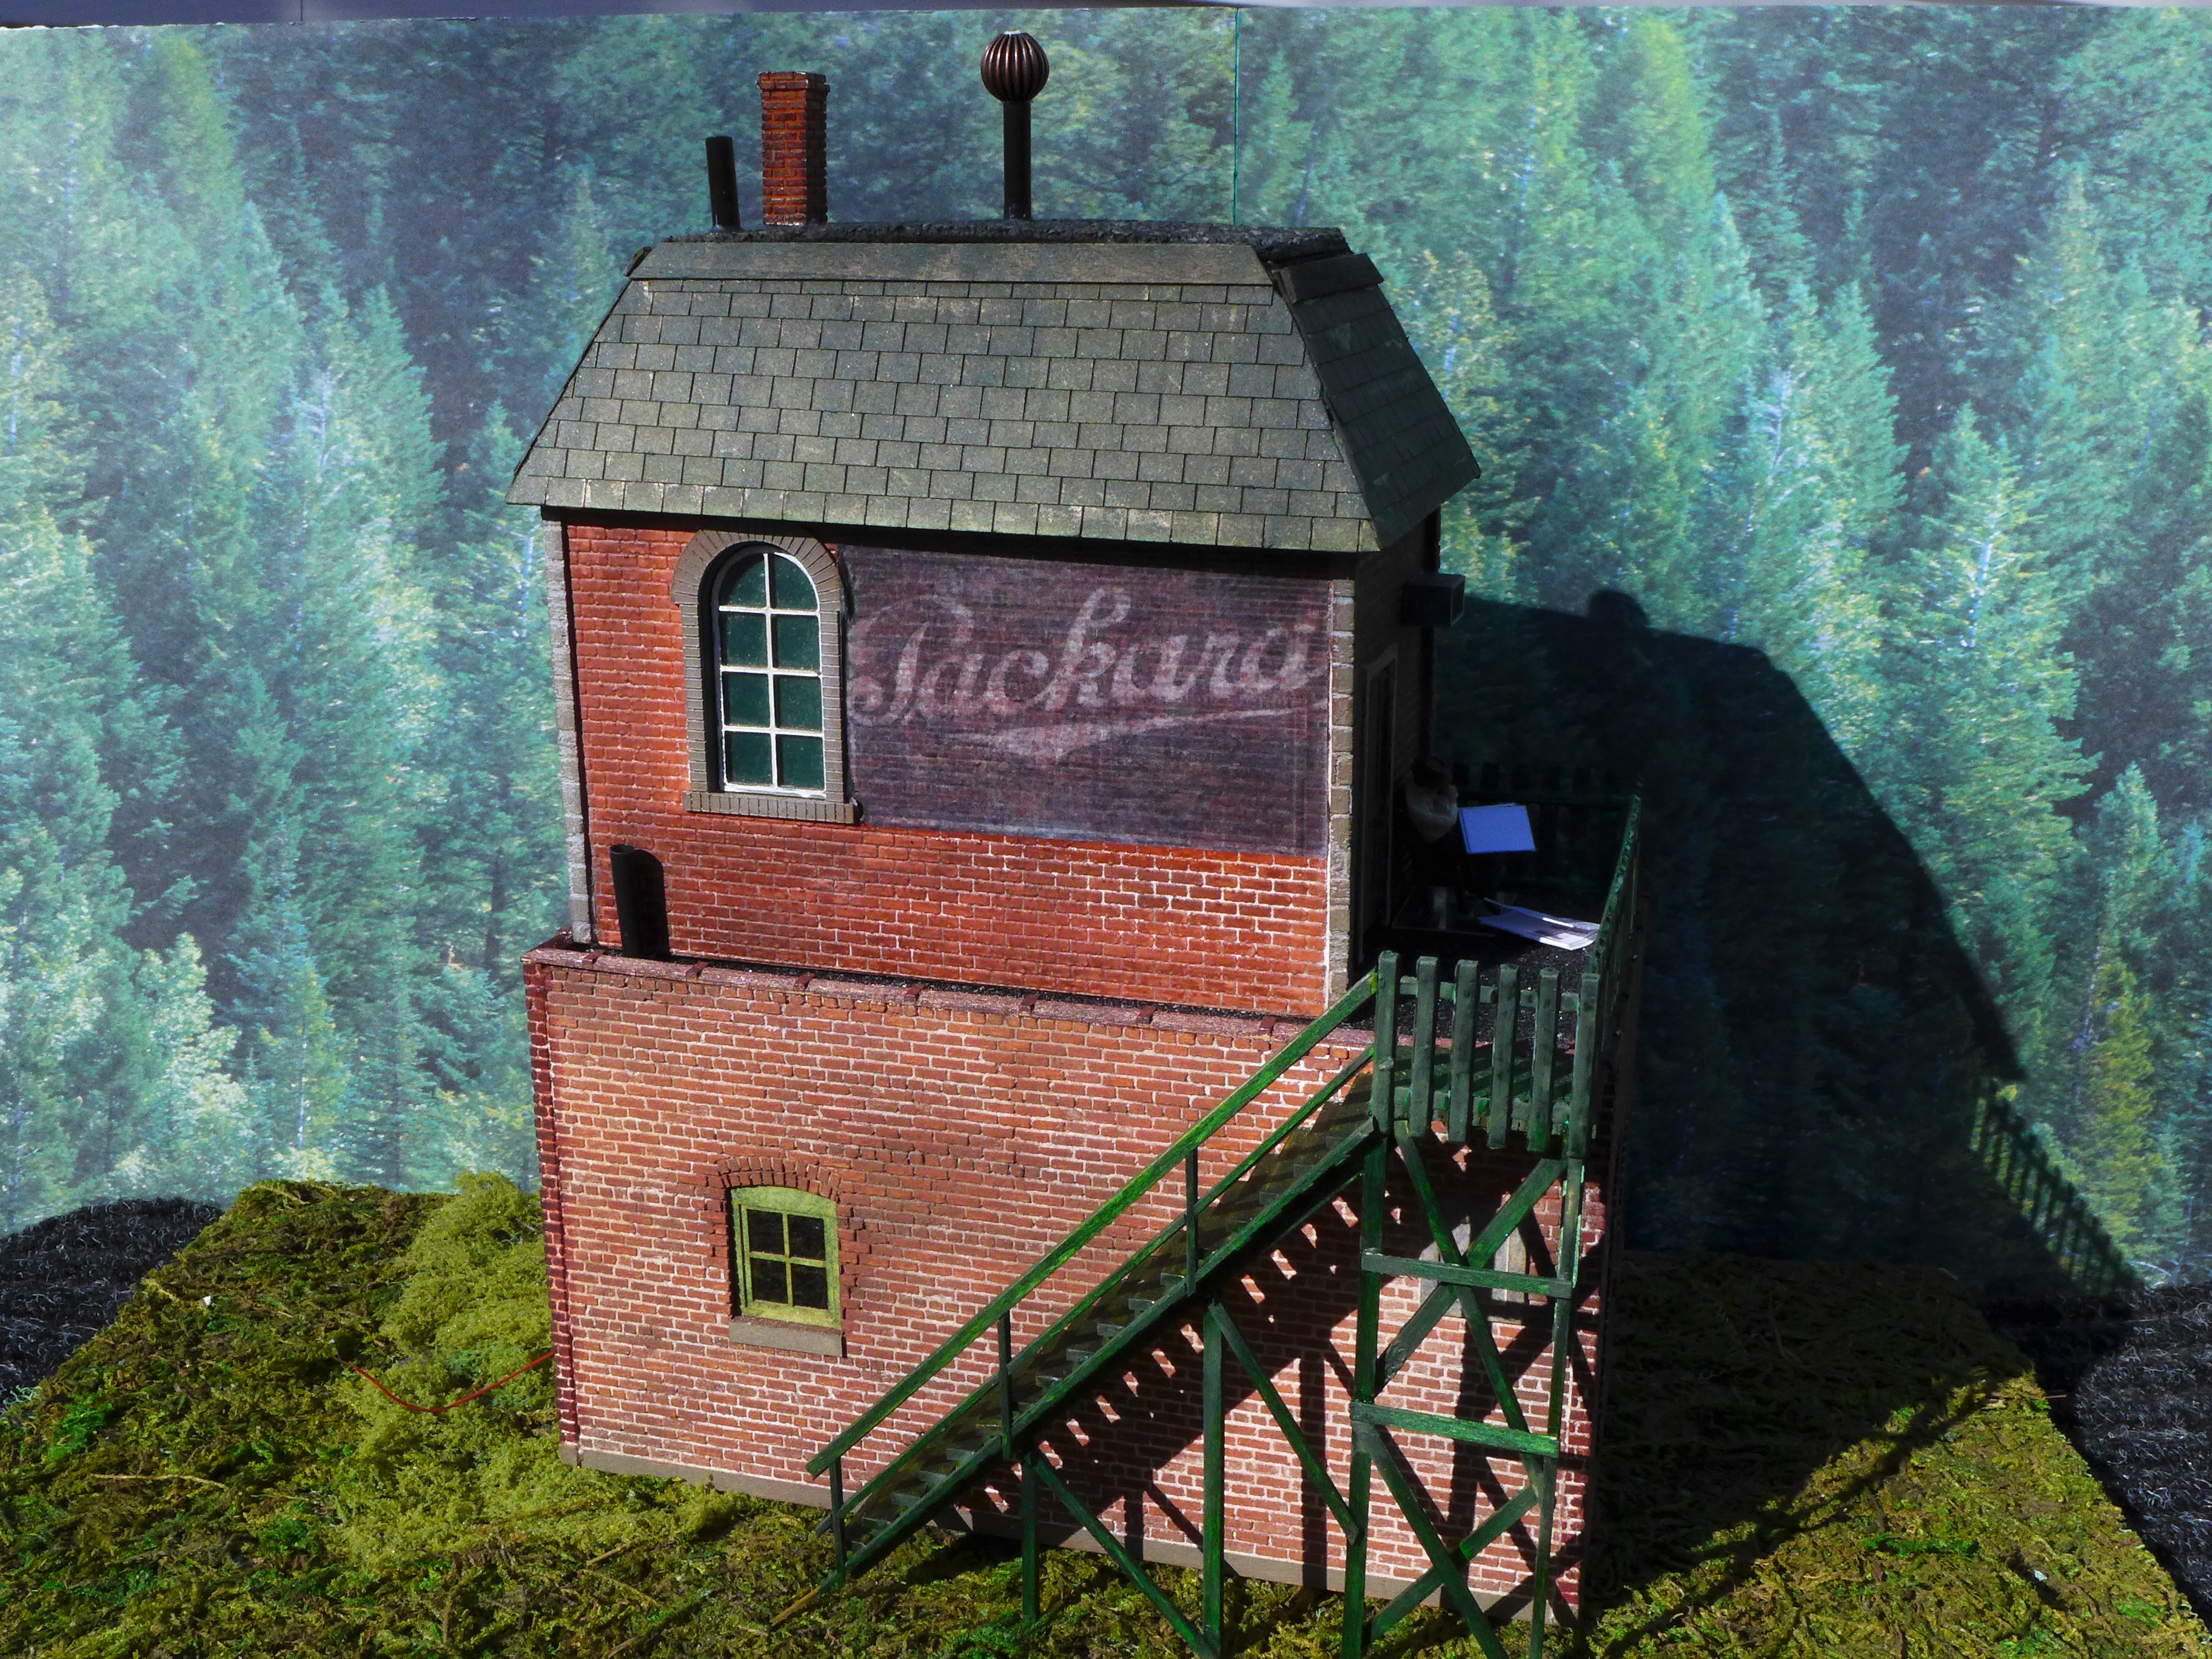
Here are a couple of other of my ghost signs incorporated into model buildings, models by Ted Dimone.


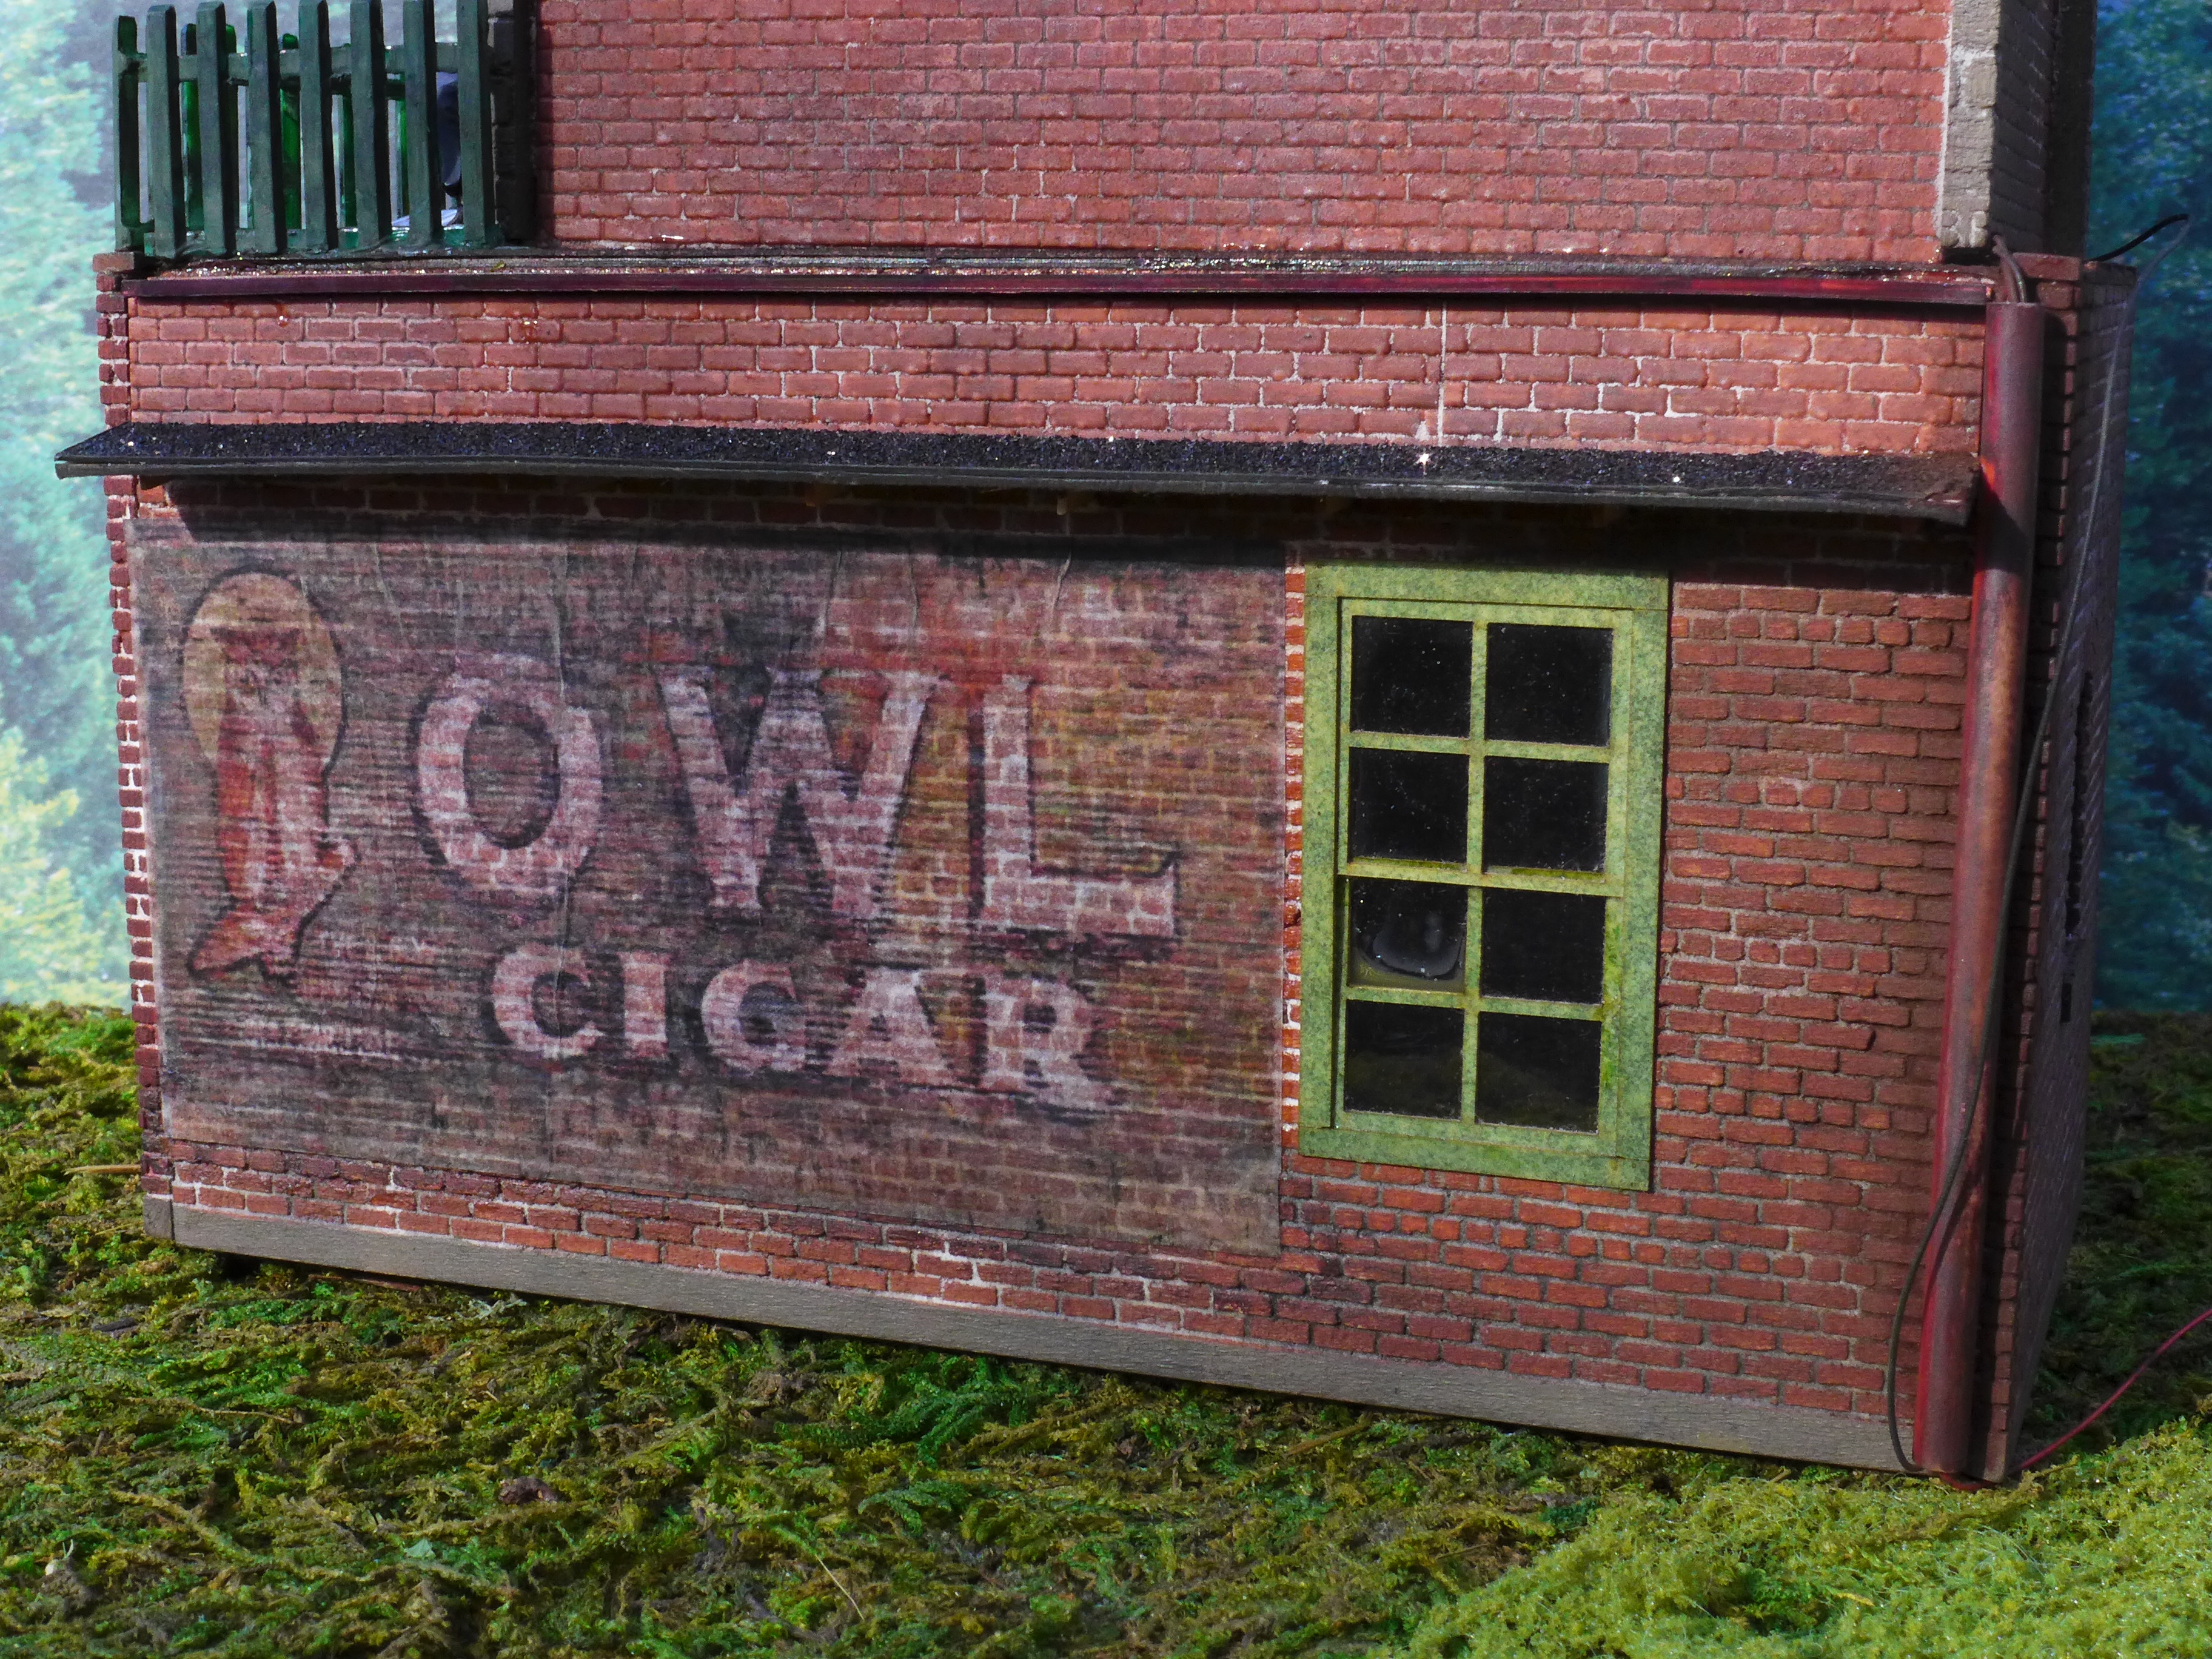
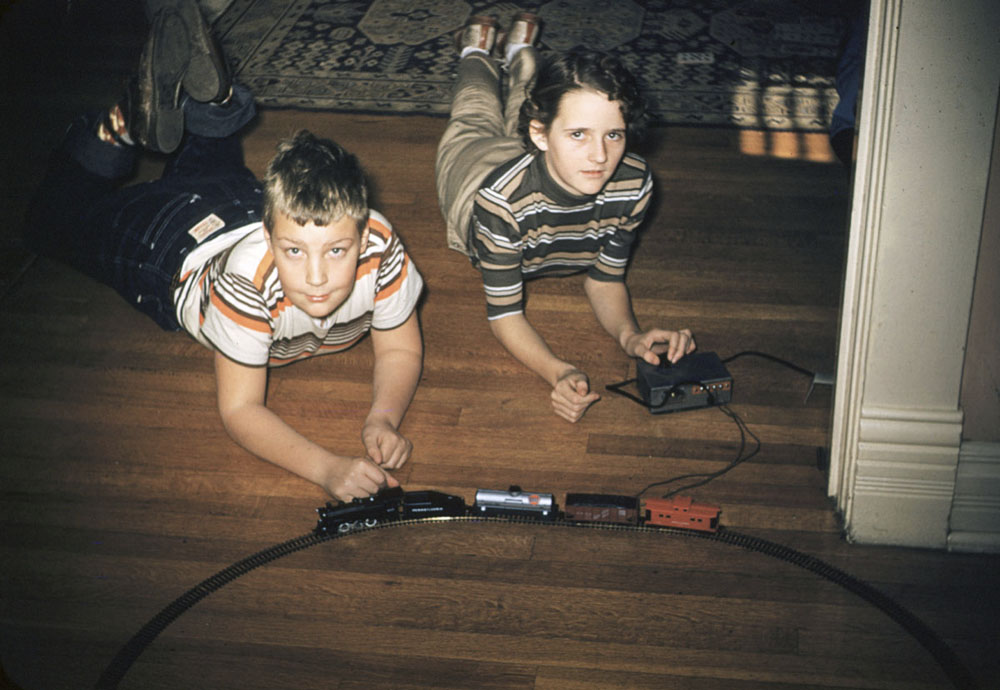
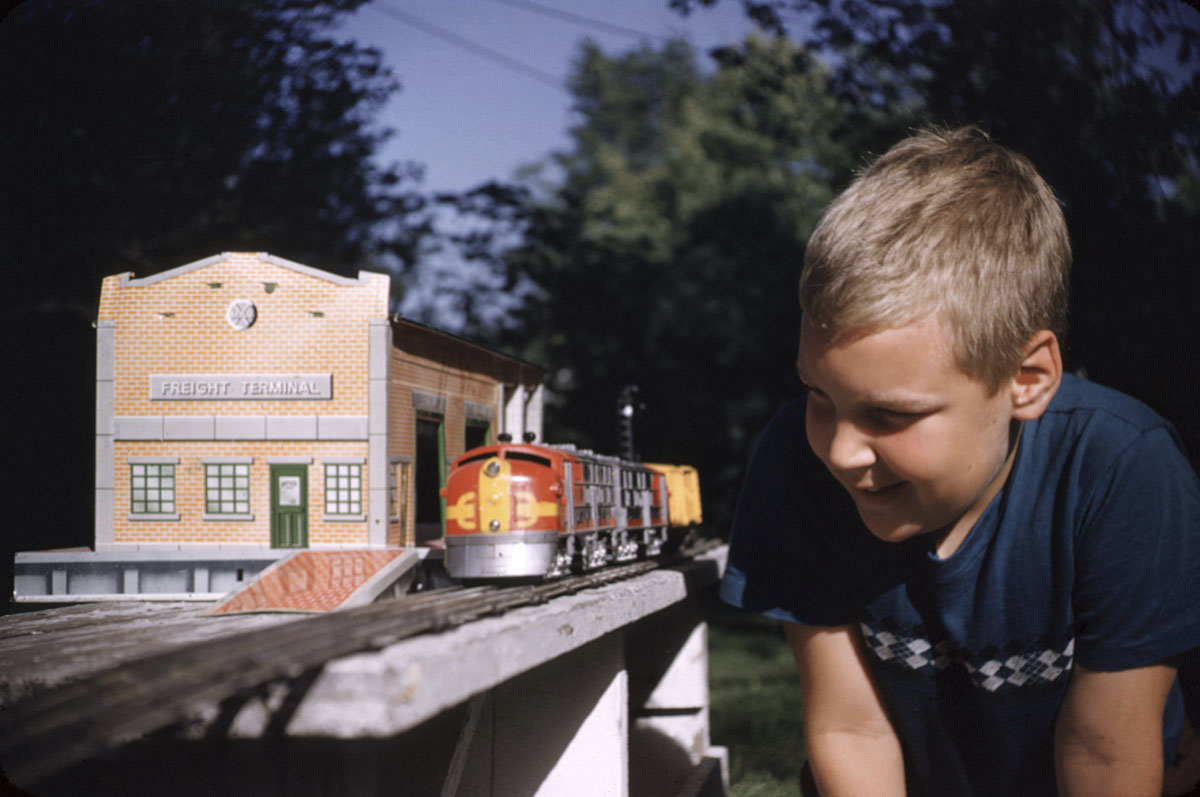
Just to illustrate my extensive personal model railroading background (not), here I am in 1954.  These setups are not exactly what model railroaders consider to be a serious layout, but they were fun when I was seven.

Me with my girlfriend at the time, Janice Gay Davis, in 1955.

New Canon ifp8400 Printer

I just set up my new Canon Printer that I got at a bargain price. It is the ImagePROGRAF iPF8400 model which is the workhorse in many professional print shops. It will print up to 44″ wide media.  The printer was sitting down at the Canon Distribution center in Costa Mesa. It was open box, the previous model, sort of an orphan printer, and not something Canon could ever sell. It still had the orange packing tape on it. I got it for the price of a set of inks (which it came with) so I basically got the printer for free. Best of all, Canon donated the money to Charity.  It is new with a full warranty.  I can’t wait to start making prints!

My Epson 7880 still works great, but the deal on the Canon was too good to pass up.

Getting it home was an adventure.  It is just over 6′ long and weights over 200 pounds.  I was able to slide it out of the van, but needed four workers to lift it off the platform and onto its base.

The printer came with a roll around stand which is convenient.

It came with a full set of twelve 330ml ink cartridges.  It can also take 750ml cartridges.

Twelve different inks, including Red, Green, and Blue for vivid colors.

It is in the studio where I do framing.  The room used to feel large, but it has shrunk with the printer added in.

American Ghosts – Image Mosaicking

The following is a brief overview of what goes into almost every ghost sign that I photograph.  The major goal is to create as close to an archival version of the sign, at high enough resolution as required, to see all of the painterly qualities of the original sign. An additional goal is also to obtain a “clean” final result where all of the foreground clutter is removed.  A final goal is to make the ghost sign appear to have been photographed “straight on” by using perspective correction in post-processing.

Photos are taken from multiple camera positions to “see” around foreground obstacles.  Multiple images are photographed at each camera position to increase resolution in the final image.  In some cases, this can result in hundreds of separate images from a dozen camera positions. The following illustrates the images that went into three separate camera positions for a ghost  sign in Helena, Montana.


The images from each camera position are then separately mosaicked. I use the program Stitcher from Autodesk – which is no longer available. Too bad. It has numerous features that I have not found in other mosaicking programs.


Then, in Photoshop, I isolate and remove foreground obstacles from each intermediate mosaic.  The poles and wires are highlighted in cyan in the following image.


The resulting intermediate mosaics are then aligned and blended in Photoshop. Since the sky and clouds change between camera setups, the sky in the final image must be replaced. The resulting images are 2 to 8 gigabytes.

It’s as simple as that!