The following is a brief overview of what goes into almost every ghost sign that I photograph. The major goal is to create as close to an archival version of the sign, at high enough resolution as required, to see all of the painterly qualities of the original sign. An additional goal is also to obtain a “clean” final result where all of the foreground clutter is removed. A final goal is to make the ghost sign appear to have been photographed “straight on” by using perspective correction in post-processing.
Photos are taken from multiple camera positions to “see” around foreground obstacles. Multiple images are photographed at each camera position to increase resolution in the final image. In some cases, this can result in hundreds of separate images from a dozen camera positions. The following illustrates the images that went into three separate camera positions for a ghost sign in Helena, Montana.

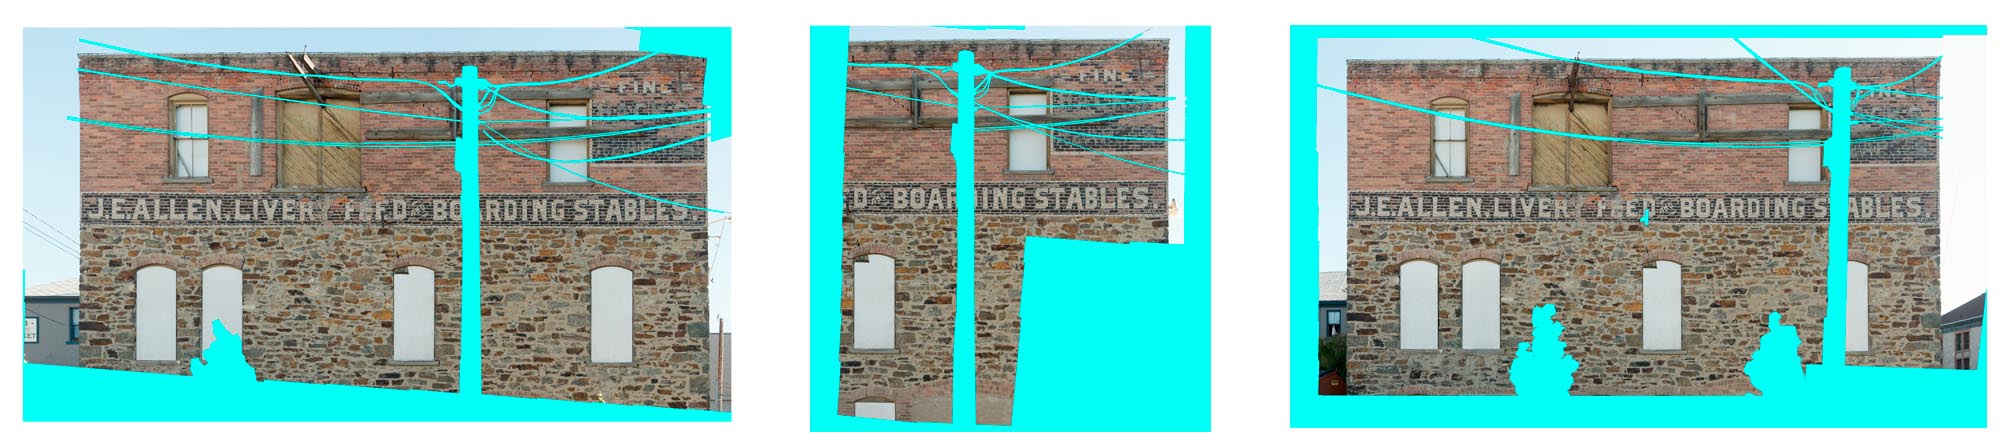
The images from each camera position are then separately mosaicked. I use the program Stitcher from Autodesk – which is no longer available. Too bad. It has numerous features that I have not found in other mosaicking programs.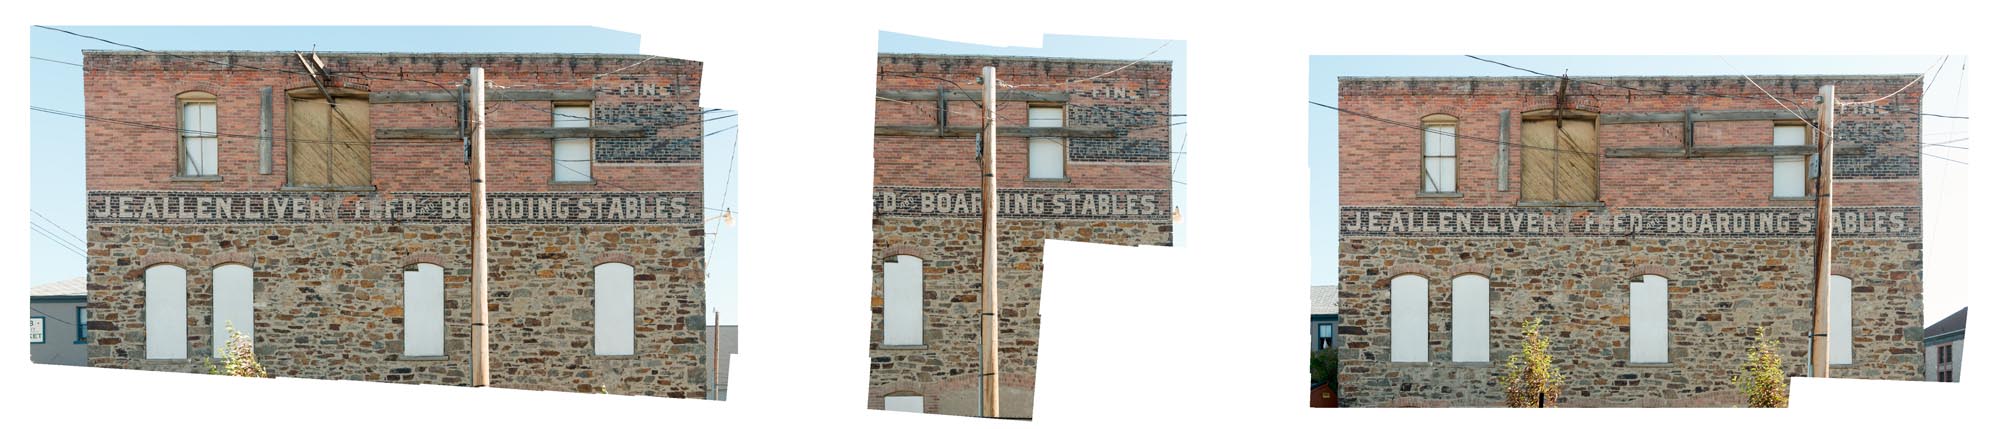
Then, in Photoshop, I isolate and remove foreground obstacles from each intermediate mosaic. The poles and wires are highlighted in cyan in the following image.
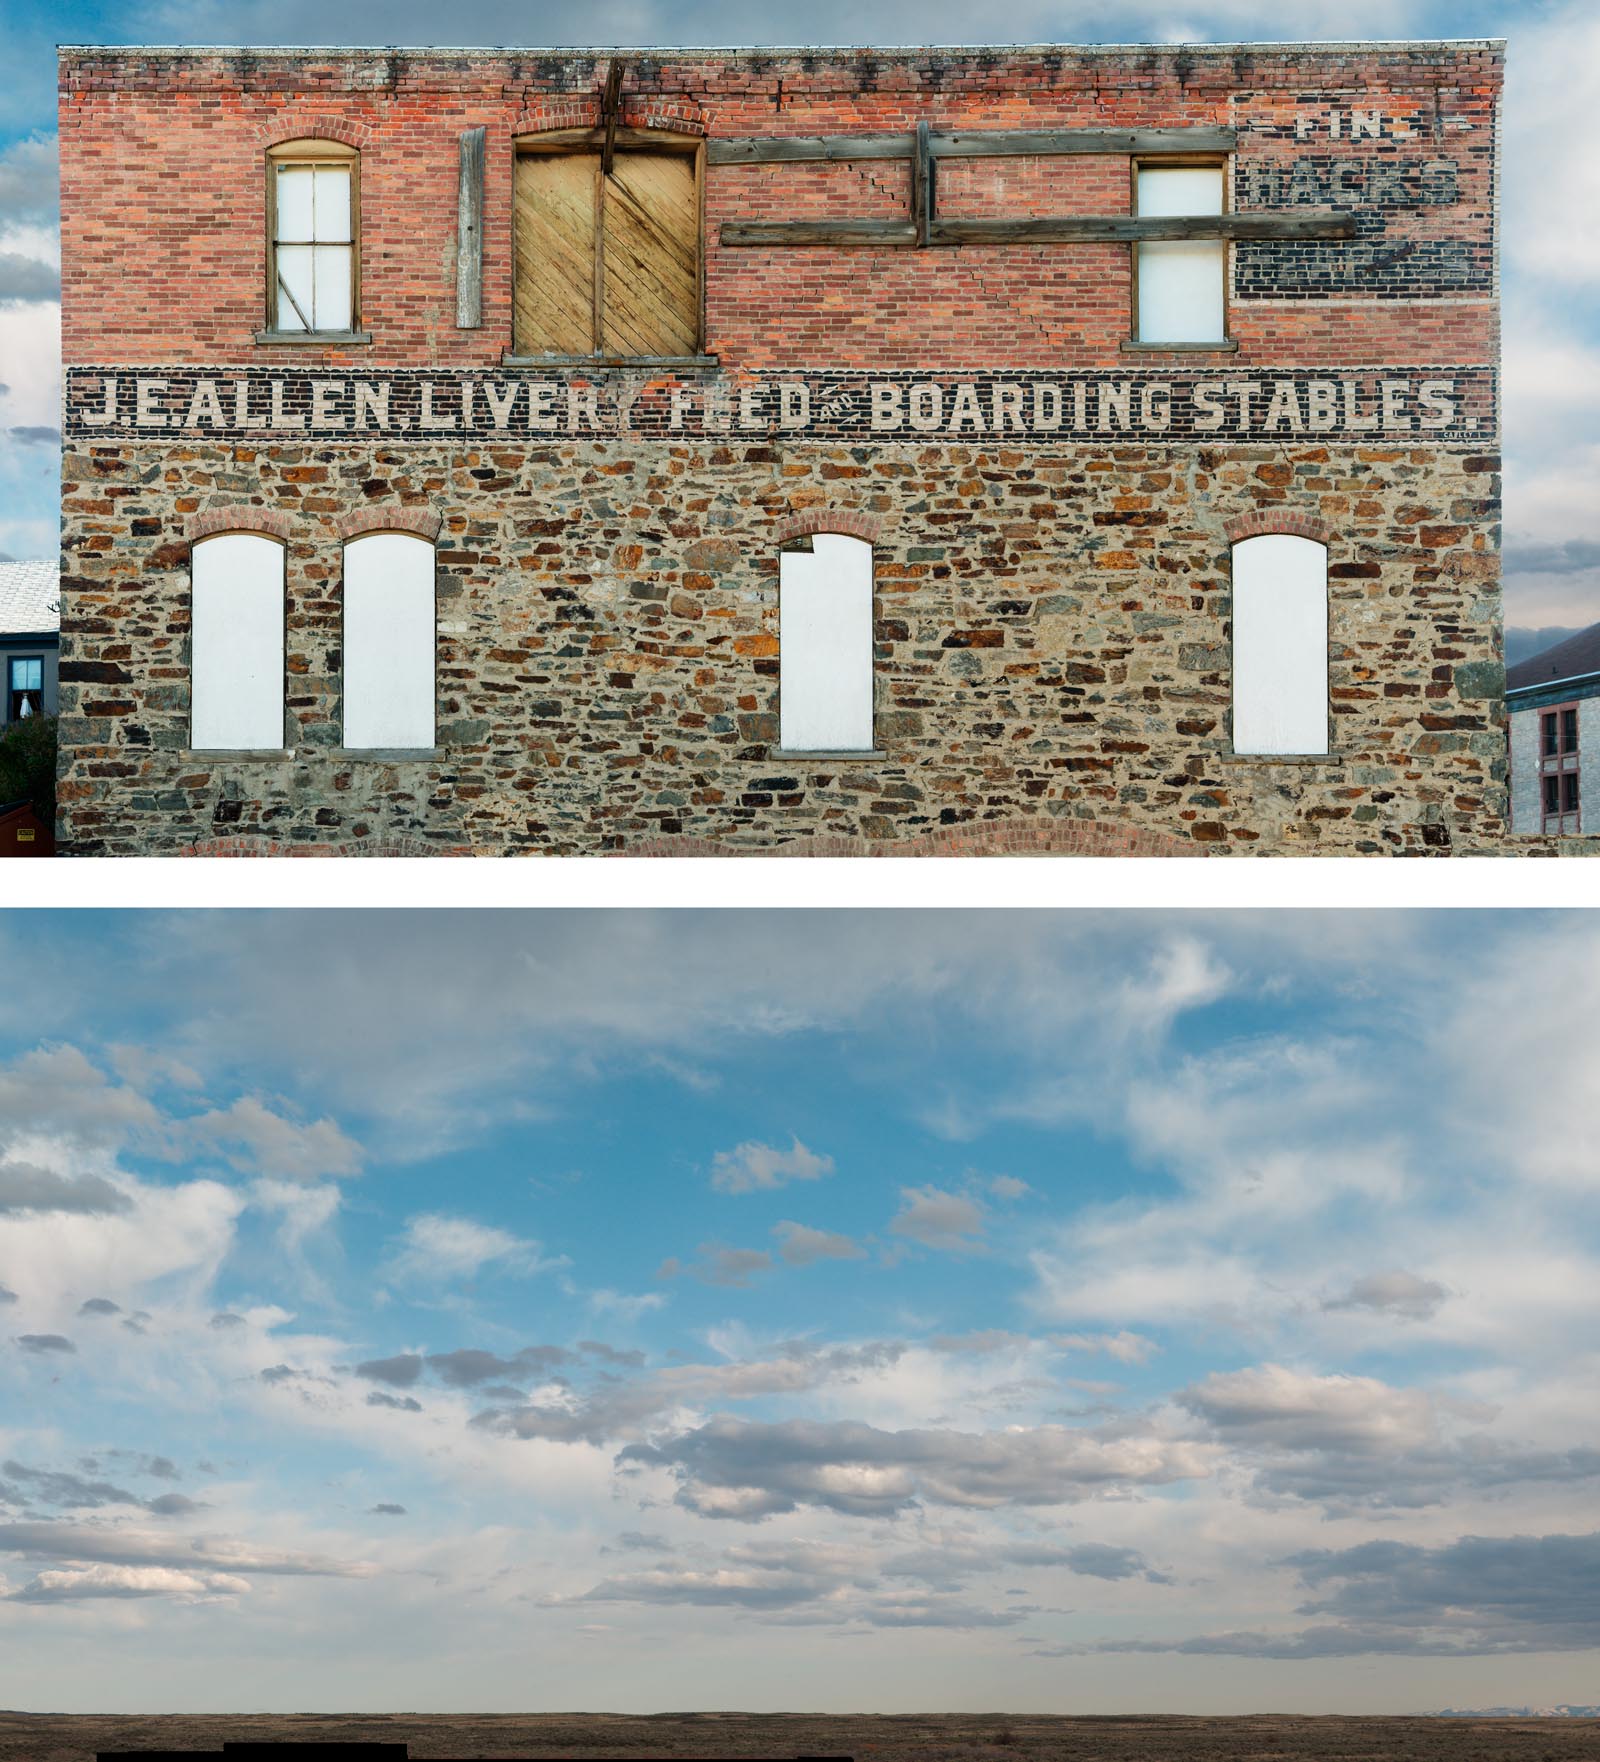
The resulting intermediate mosaics are then aligned and blended in Photoshop. Since the sky and clouds change between camera setups, the sky in the final image must be replaced. The resulting images are 2 to 8 gigabytes.
It’s as simple as that!